There are two Phases to this operation. Phase I involves getting the block into a drawing. For Phase II we save that drawing as our template.
__________________________
Phase I
We begin by starting C&G then going to the Insert > Block Menu. It is important you use a fresh Drawing1.dwg.
Figure 1.
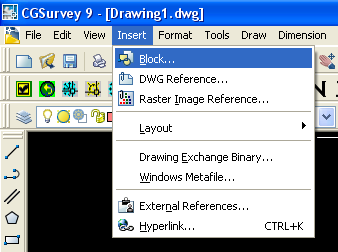
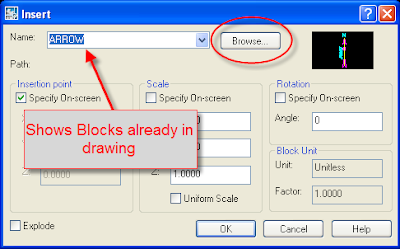
This action opens the Insert Block Dialog Box.
The Name field shows blocks which are already in your drawing. (To see a list of all the blocks in the drawing choose the choices button to the left of the name field.)
If you saved the drawing with a preview button you will be able to preview the image in the upper right corner of the dialog box.
Because we want to add a block that is not already part of the drawing we choose the Browse Button.
Figure 2.
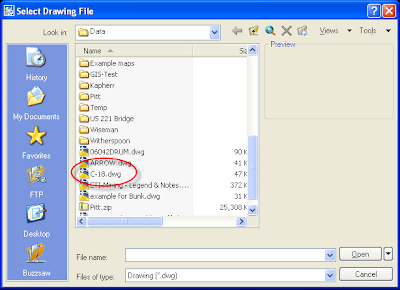
Choosing Browse Opens the Select Drawing File dialog box. We then navigate to the appropriate location and choose the drawing to insert as a block. In this example we will insert a drawing called C-18.dwg
Figure 3.
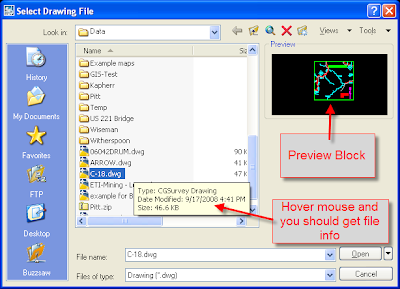
We choose C-18 by using your mouse to left click on the name from the list of drawings stored in the active folder. If we left click once we see a preview in the upper left of the dialog box. We can also hover our mouse and (depending on your system settings) we will see an information box appear. When we are satisfied this is the file we want, we can double left click the file name or we can left click once then move the mouse down to the lower left and click open.
Figure 4.
"Opening" the drawing will take us back to our drawing. The block will be on your cursor. You can move your mouse to place the block.
Figure 5.
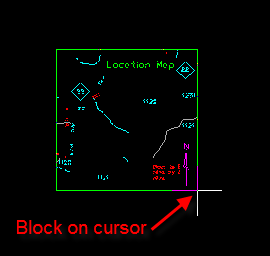
In this case however, do not do that. Instead, use the escape key to stop placing the block. Even though you did not place the block on the screen it is now part of the drawing.
_____________________
Phase II
Now that we have the block in Drawing1.dwg we want to make that our default template.
Here is how we do that.
From the Pull down menu go to File >Save. (You can use the keyboard shortcut or toolbar icon if you wish as either of those will get exactly the same result.)
Figure 6.
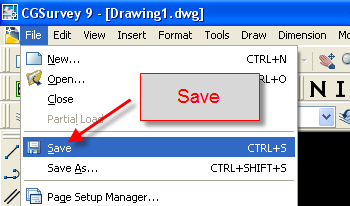 Executing this command brings up the Save Drawing As dialog box. (Note that this box only appears the first time you save a drawing. If you have a drawing that has already been saved and wish to save a copy you should use the File>Save As command.)
By default the Save As dialog box will save the drawing as a standard AutoCAD drawing file. This means you get a dwg file type. But that is not what we want.
Figure 7.

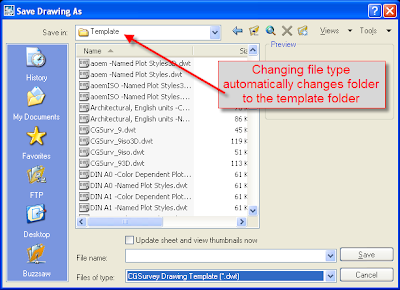
We want to save our drawing as a template. So we have to change the file type shown at the bottom of the dialog box. We want to save as an AutoCAD template. Template files have a dwt extension.
Figure 8.

When we change the Files of Type box to dwt the program automatically changes the current folder to the template storage folder.
Figure 9.
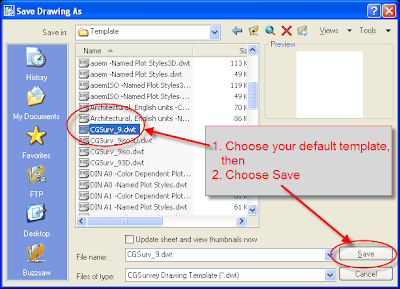
For CG 9 the default template is named CGSurv_9.dwt. (For CG 8 the default template name is CGSurv_8.dwt. For CG 7 the default is CGSu.dwt.)
Locate your default template and either double left click the file name or left click once then left click open.
Figure 10.
When you save a file with the same name as a file that already exists, you will get a warning box asking if you want to overwrite the existing file. In this case we do so choose Yes.
Figure 11.

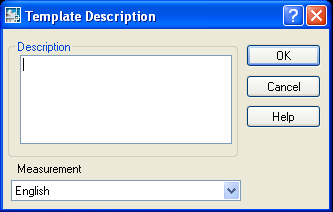
Next, we get a Template Description Dialog Box. If you wish you can type a detailed description of the template and what it is designed to do. Or, if you wish you can leave the box blank. Either way this box provides input to the user and will not in any way affect your actual drawings. When you finish typing (or not typing) left click Ok.
Figure 12.
Your block is now a part of the drawing. To check you can go to the Insert>Block menu for confirmation.
Figure 13.

If you wish to make other changes to your template now is a good opportunity to do so.
When you have finished making those changes, I recommend closing then restarting
the program.
I will get into more details concerning blocks in a future post. Please subscribe to my blog feed or check back regularly.
Larry P


No comments:
Post a Comment